By the way- the Dollar Tree is my favorite store! I get almost everything there! And I'm not talking about Dollar General- I'm talking Dollar Tree- where everything is a dollar! One of my favorite gifts to give for bridal showers or Christmas are etched glasses. They have very nice and big wine glasses, beer glasses, and mason jar glasses at the dollar store. I use my cricut, vinyl, and etching cream and they make beautiful gifts! I have also painted them as well and cured them in the oven.
I use a lot of spray paint... Literally, I spray paint everything. Even things that probably shouldn't be spray painted.. I do it anyway. I'm talking from every picture frame I have found at a garage sale to the plastic cushions to my front porch chairs- they haven't even chipped... not going to lie, I'm a little surprised they have held up. It was supposed to be temporary. They also have glitter spray paint. Um, yes please!
I plan on sharing lots of my crafts on here and the renovations we have done and will continue to do at our home. My husband and I always have some type of project going on.
 |
| I love this project... You dont really get to see how big it really is, but it's huge! My mom got this frame for me at a garage sale before our wedding. We used it for wedding pictures. Afterwards, I decided to paint it. The background is actually a shear curtain I found that I just really liked the pattern of (plus is was cheap).However, you could also do fabric. The frames were bought at the dollar store for around $6 each. They were black but I spray painted them white. The "B" is just a wooden "B" from a craft store that I painted. The sign is wood and I painted it and used vinyl (with my cricut). I placed everything where I wanted it and had my hubby screw screws where I wanted the pictures- I simply hung them on the screws. This hangs in our dining room and I love it! Everyone that comes to my house always asks about it. |
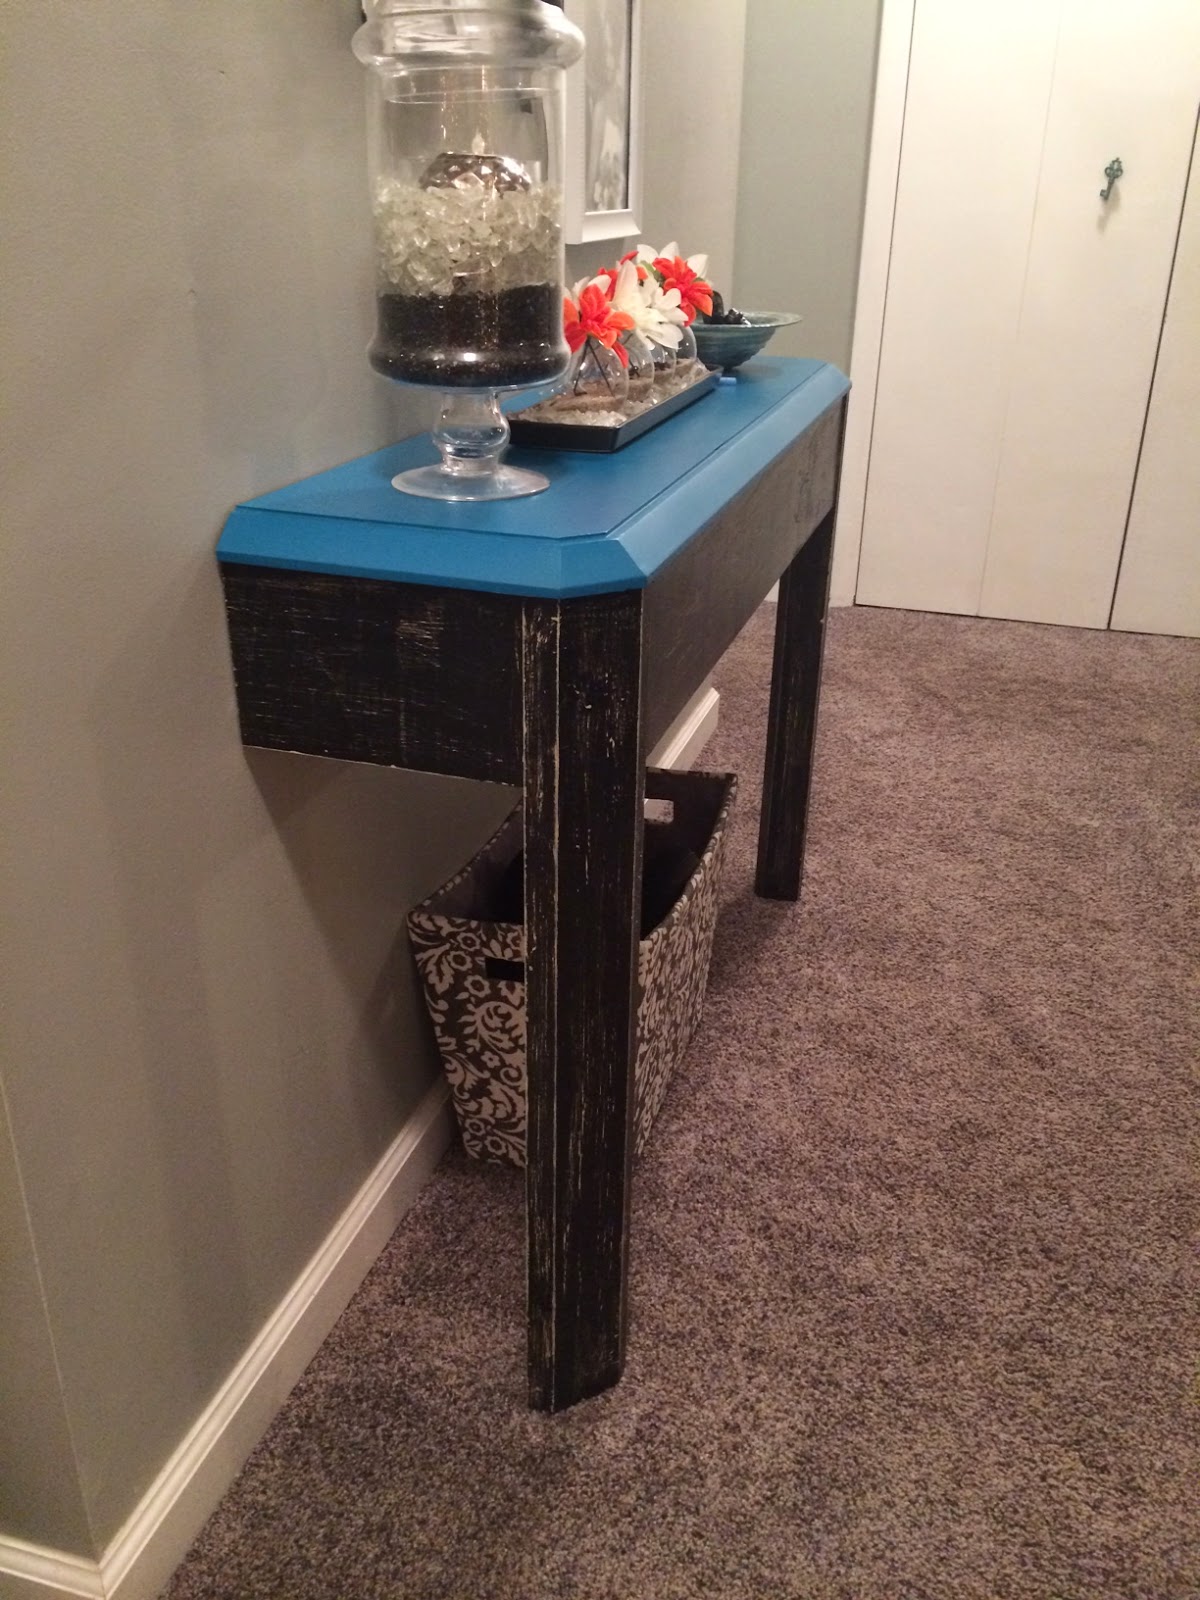 |
| Another garage sale find, thanks to my mom!! This table was twice this size... I had my hubby cut it in half and then we painted the top of the table to match our decor. Perfect for our entryway! |
 |
| I just love the way pinterest shows how to decorate a shelf.. Layer things, and also hang things. Plus, I made this banner with my cricut and it was the perfect touch to finish this little shelf in our kitchen. |
 |
| I'm sure everyone has seen picture collages on pinterest. This is our entryway.. I have changed it and moved things around a lot, but I think I am finally happy with how it looks. When you do this, do a mixture of pictures and wall hanging.. Plus I have noticed that it looks better when things hang close to each other rather than too far apart. |
 |
This is our front porch that we just added this past summer. I found a bifold door at a garage sale and figured I would find something to do with it. It was originally white, I spray painted it this maroon color (to match our outside decor). We then attached our mailbox to it. I bought the "welcome" letters from Michael's. I spray painted them as well and glued them to the door with hot glue. I also added the flowers (from the dollar store). I also added the little key on the knob... just a little extra touch.  This was another find by my mom. She got it for me at a garage sale. I used Annie Sloan (old white) chalk paint, sanded it to get a mroe rustic look, and then waxed it. I loved the way it turned out. She only paid $5 for it! I also bought the drawer knows and handle at Hobby Lobby (on sale). We keep this in our kitchen and it holds all of our wine/drinking glasses. |

*First dance picture with lyrics* I simply bought this frame from the dollar general ($5 I think). I used pencil first (very important) and did a rough draft of the lyrics around the photos. It can take several attempts to make it looks good... spacing and such. Then I took a thin sharpie to go over the words once they were the way I wanted them. Then just added the photo. It's a 5X7. VERY easy project!

Both of these projects were old picture frames found at the thrift store. The top one is much bigger and the bottom ones are only 4X6. I spray painted the frames and used my cricut to cut the letters. The backgrounds are either cardstock or I simply spray painted the wood behind the frame.

*This was super easy... I bought the frame from Meijer and used my husbands, sons, and my hand... the only thing that was tricky was getting my 6 month old to do a hand print... I used regular craft paint on white cardstock and a thin sharpie to write our names and date.

*This is a piece of furniture my mom found for me at a garage sale (my mom finds all kinds of stuff for me- thanks mom!) I used two different colors of Annie Sloan chalk paint (old white & the orange). I simply mixed the colors until the got the coral color I wanted. If you've never used chalk paint before, it's very simple and it's my favorite (only bad thing is the price). You don't need to sand or prepare the wood any way at all (my favorite part). I did 2 coats of the paint and then used the old white color and a stencil I found at the flower factory to do the pattern on the doors. I then sanded it to get my rustic look, and then applied the Annie Sloan wax (a must if you paint with Annie Sloan paint- more $$ unfortunately). It turned out perfectly and will be a great addition to our florida room.

This is an old barn window I got from a friend for free! YAY! The print is an engineer print from UPS- these cost around $5 or so and they take no time at all to print (they always come in black and white and are large). I have about 4 of them in my home and LOVE them!

Here is another project I did with an engineer print. I took a photo of the TMNT action figures (top) on my phone and took the picture to get blown up (an engineer print). I then bought a piece of plywood only about 1/4 inch thick and had my hubby cut it into three pieces. I then cut the engineer print into thirds (the same size as the wood). I spray painted the sides of the wood black so it would have a nicer finish. I bought an adhesive spray (this can be hard to work with! You have to move quick and not make any mistakes!) and used it to glue the print down to the wood. I then used just double sided sticky tape (you can buy it at wal-mart that holds a lot of weight) to hang them up. This hangs in Zane's palyroom.

Here is another project I did with an engineer print. I took a photo of the TMNT action figures (top) on my phone and took the picture to get blown up (an engineer print). I then bought a piece of plywood only about 1/4 inch thick and had my hubby cut it into three pieces. I then cut the engineer print into thirds (the same size as the wood). I spray painted the sides of the wood black so it would have a nicer finish. I bought an adhesive spray (this can be hard to work with! You have to move quick and not make any mistakes!) and used it to glue the print down to the wood. I then used just double sided sticky tape (you can buy it at wal-mart that holds a lot of weight) to hang them up. This hangs in Zane's palyroom.
This is another old barn window I received from a friend. It was already very rustic looking so I didn't have to do anything to the frame. I took out all of the glass (some of it was broken anyways) and just cleaned it up a bit. I then added a piece of wood behind 3 of the window openings. I attached decorative scrapbook paper to two of them and painted the third with chalk paint (I always have this around-comes in handy more often then you think!). My husband was nice enough to attach the mason jar to one of the peices of woodn for me. I then hung small picture frames on the wall and in the frame. I also added the 3 hooks at the bottom.

This is an old coffee table I found at Goodwill and turned it into a bench for our bedroom. I painted the legs to match our room. I then went to joanne's to get the foam, batting, and fabric. Of course measure your piece of furniture and then you can get foam cut to the size you want and buy the right amount of batting. I put the cushion down first and then wrapped the batting around and stapled it with my husbands staple gun. I think carefully placed the fabric evenly on the bench and stapled it as well. All done!

This was a "lucky I already have the material" project. My husband just remodeled our florida room and put up this wood for our walls and then stained it. The pieces of wood actually lock into each other. Since he had extra pieces I stole them for this project. The wood is actually pretty cheap at home depot/ Lowe's. I painted it with spray paint to match our outside then made stencils from my cricut and sponged a light coat of tan paint. My husband also connected the 3 pieces of wood for me so they would stay attached.
 |
| I used the same wood from the previous project with this project. It is basically the same thing. I just spray painted the wood and stenciled the letters on. The flowers are from the dollar store and I just glued them on with a hot glue gun. SIDE NOTE-- When you buy fake flowers, sometimes they will be all smashed and not lay right. If you have a heat gun (or a blow dryer may work just as well), use it to blow out the flowers to make them lay flat. This makes your project look a lot better! |

I've been wanting to do this project forever. I actually did this all by myself without any help from the hubby! So it can't be that hard... I bought the white shears from the thrift store. They were actually two very long pieces and I cut them in half to make 4 total. That then required me to sew the ends of the two I cut to make sure they would attach to the curtain rod. I bought 2 curtain rods. I measured out over the bed the distance I wanted and used two hooks (I luckily had lying around) to attach the curtain rod to the ceiling. The hooks they came with wouldn't work because I was attaching it to the ceiling, not the wall. The curtain rod fit perfectly inside the hooks that just screwed into the ceiling. I then hung the other curtain rod onto the wall above the bed (and the length of the bed). I used the regular curtain rod hangers this time. I then attached the shears to the first curtain rod and hung the shears behind the second. I then pulled some slack in between the two rods.
The large print above our bed is another engineer print. The frame is from ikea. I simply painted the matting of the frame purple to match our room.

DIY growth ruler. I couldn't wait to do this project. I love the idea of documenting our kids' height over the years and being able to take them with us no matter what house we live in.
I bought the wood from Home Depot. Nothing special. I had my husband cut it down a bit and I painted it white. I then marked the measurements on the board using a yard stick. You can use any kind of stencil, but I used my cricut to cut out the numbers and also used it for the measurement marks. I simply used black paint and a sponge with the stencil.
No comments:
Post a Comment